.jpg)
こんにちは、渡邊です。
GeneXus16 Upgrade 11から「GeneXus Office」というモジュールが追加されています。
GeneXus Officeモジュールを使用してエクセル出力機能を開発すると、
これまで実現できなかったセルの背景色や罫線の設定などができるようになります。
今回もご紹介を兼ねて検証したいと思います。
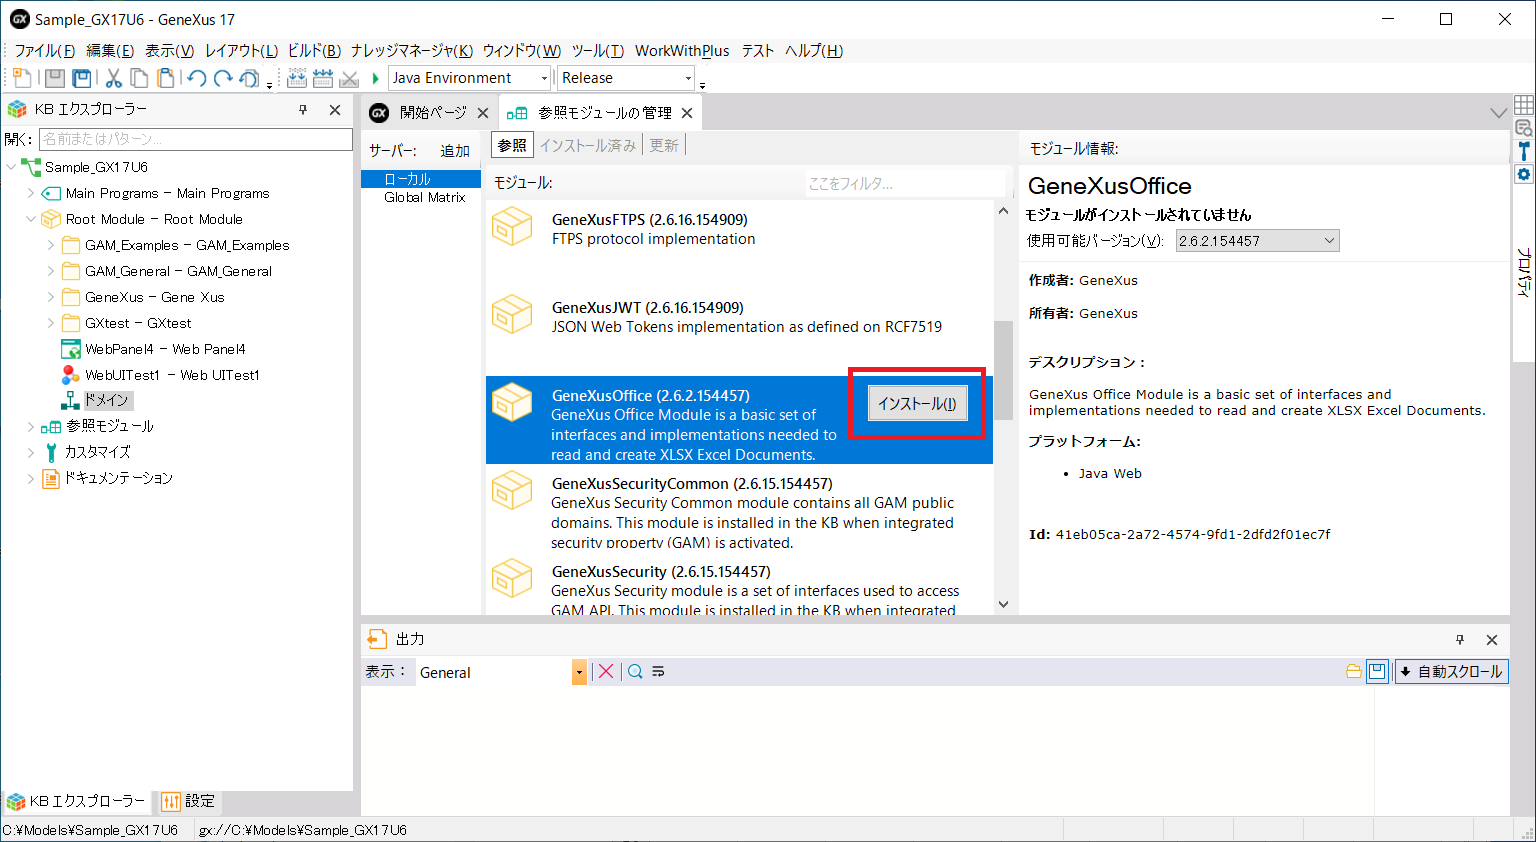
準備
参照モジュールの管理画面を表示し、「GeneXus Office」モジュールをインストールします。
なお、今回はGeneXus 17 Upgrade 6で検証しています。
サンプルプログラム
GeneXus Officeモジュールのデータタイプを使用した、エクセル出力のプロシージャを用意しました。
&Random = Random() * 10000
&Filename = !'ExportSampleTrn-' + &Random.ToString().Trim() + !'.xlsx'

&ExcelSpreadSheet.Open(&Filename)
Do 'CheckStatus'

&CellRow = 1
&FirstColumn = 1

// ヘッダ行のデータのセット
&ExcelSpreadSheet.Cell(&CellRow, &FirstColumn + 0).ValueText = !'Id' //テキスト型のデータ
&ExcelSpreadSheet.Cell(&CellRow, &FirstColumn + 1).ValueText = !'Name' //テキスト型のデータ

// ヘッダ行のスタイルのセット
&ExcelBorderStyle = new()
&ExcelBorderStyle.Color.SetColorRGB(0, 0, 0) //文字色
&ExcelBorderStyle.Type = CellBorderType.THIN //罫線の種類
&ExcelCellStyle = new()
&ExcelCellStyle.Border.SetAll(&ExcelBorderStyle) //罫線を上下左右に設定
&ExcelCellStyle.Fill.BackColor.SetColorRGB(0, 191, 255) //セルの背景色
&ExcelCellStyle.Font.Bold = 1 //文字を太字
&ExcelCellRange = new()
&ExcelCellRange = &ExcelSpreadSheet.Cells(&CellRow, &FirstColumn, 1, 2) //範囲の指定
&ExcelCellRange.SetCellStyle(&ExcelCellStyle) //スタイルをセット

// 明細行のスタイルの定義
&ExcelCellStyle = new()
&ExcelCellStyle.Border.SetAll(&ExcelBorderStyle) //ヘッダ行と同じ罫線の設定

For each SampleTrn
    where SampleTrnName like &SampleTrnName when not &SampleTrnName.IsEmpty()

    // 明細行のデータのセット
    &CellRow += 1
    &ExcelSpreadSheet.Cell(&CellRow, &FirstColumn + 0).ValueNumber = SampleTrnId //数値型のデータ
    &ExcelSpreadSheet.Cell(&CellRow, &FirstColumn + 1).ValueText = SampleTrnName //テキスト型のデータ
    // 明細行のスタイルのセット
    &ExcelSpreadSheet.Cells(&CellRow, &FirstColumn, 1, 2).SetCellStyle(&ExcelCellStyle) //スタイルをセット
Endfor

// フッタ行のスタイル
&ExcelCellStyle = new()
&ExcelCellStyle.Font.Bold = 1 //文字を太字
&ExcelCellStyle.Alignment.Horizontal = CellHorizontalAlignment.Right //右寄せ
&ExcelCellRange = new()
&ExcelCellRange = &ExcelSpreadSheet.Cells(&CellRow + 1, &FirstColumn, 1, 2) //範囲の指定
&ExcelCellRange.Merge() //セルの結合
&ExcelCellRange.SetCellStyle(&ExcelCellStyle) //スタイルをセット
// フッタ行のデータ
&ExcelCellRange.ValueText = !'合計' + Trim(Str(&CellRow - 1)) + !'件' //テキスト型のデータ

&ExcelSpreadSheet.Save()
Do 'CheckStatus'
&ExcelSpreadSheet.Close()

Sub 'CheckStatus'
    If (&ExcelSpreadSheet.ErrCode <> 0)
        &Filename = ""
        &ErrorMessage = &ExcelSpreadSheet.ErrDescription
        &ExcelSpreadSheet.Close()
        Return
    Endif
Endsub
変数の&ExcelBorderStyle、&ExcelCellRange、&ExcelCellStyle、&ExcelSpreadSheetはそれぞれ
ExcelBorderStyle、ExcelCellRange、ExcelCellStyle、ExcelSpreadSheetというデータタイプです。
各行の説明につきましては割愛させていただきますが、 特に複雑なロジックではないかと思います。
実行結果
上記のプロシージャが出力したエクセルは下図になります。
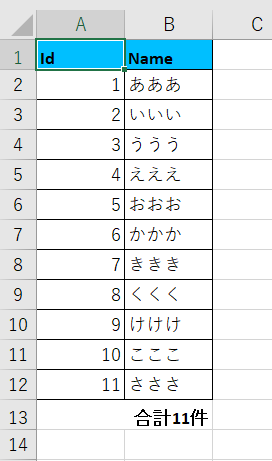
ExcelDocumentデータタイプを使用したエクセル出力では実現できなかった、
セルの背景色、罫線、セル結合が実現できました!!
今回は確認しませんでしたが、ワークシートのコピーや行や列の操作などもできるようです。
注意事項
夢が膨らむGeneXus Officeモジュールですが、注意事項が2つあります。
一つ目は現在の最新版であるGeneXus 17 Upgrade 6でも対応しているジェネレータ―はJavaのみのようです。
他のジェネレータ―のサポートが待ち遠しいですね。
もう一つは英語のGeneXus Wikiに下記の一文が記載されていました。
But, on the other side, it does not support (by the design of the implementation on which it lies, called POI XSSF in Java) creating spreadsheets with thousands of rows and hundreds of columns.
【参考Wiki】GeneXus Office Module(英語)
ExcelDocumentデータタイプで開発していた際も、大量のデータを出力した場合にOut of Memoryのエラーが
表示されることがありましたが、さらにパフォーマンスが良くないようです。
まとめ
GeneXus Officeモジュールを使用すると、エクセル出力のレイアウトの自由度がかなり広がったかと思います。
今後のエクセル出力機能の開発の主流になるかと思いましたが、パフォーマンスに懸念がありますので、
出力データが多い場合にはExcelDocumentデータタイプでの開発、
出力データが少ない場合にはGeneXus Officeモジュールを使用した開発と使い分けするのが良さそうです。
この記事がお役に立ちましたら幸いです。最後までご覧頂きありがとうございました。